Placeholder Image

Subtitles section Play video

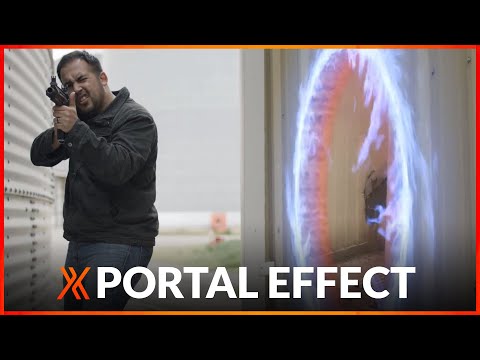
  • Greetings, filmmakers! I'm Simon Jones from HitFilm.com, here with an extended look at

  • the portal effects from Ryan Connolly's film PORTAL COMBAT. If you want to know how

  • the Dimension Rift effect works in HitFilm, you've come to the right place. If visual

  • effects and compositing is all-new to you, don't worry - this is a great effect to

  • start with. Here's the shot we'll be looking at . In

  • PORTAL COMBAT, we created complex portal designs but we'll start off by using the standard

  • portal created by HitFilm's dimension rift effect.

  • First up, make sure you've downloaded the project files. There's an info card on this

  • video which links right to them, or you'll find them on the HitFilm website or in the

  • YouTube description. Once you've downloaded and unzipped those

  • files, open the project file inside HitFilm. In the Media panel you'll find everything

  • you need, Open up the Composite Shots folder and you'll find three composite shots. Double

  • click the 'Portal shot' composite shot to open its timeline.

  • If you've already done some editing in HitFilm, you'll immediately notice that composite

  • shots are somewhat different. Whereas editing is all about creating a sequence of clips

  • one after another, compositing is about creating a stack of layers. By combining layers in

  • interesting ways you build up a cool visual effects shot. That's the essence of compositing

  • right there. So the interface layout I'm currently using

  • is designed primarily for editing. This seems like a good time to introduce the Workspaces.

  • On Windows you'll see this icon up top. On Mac you need to go to the View menu, then

  • Workspaces. There are several built-in layouts and you can make your own as well. For now,

  • select the Compositing layout. This reorganises all the panels to provide

  • a faster way of working when doing visual effects. Feel free to switch workspace and

  • re-arrange panels whenever you want, according to your preferences and screen size.

  • Feel free to explore the pre-made composite shots in the project at your leisure. But

  • right now, let's start over and build up the shot from scratch.

  • First we need to make a new composite shot. There's a bunch of different ways to do

  • this in HitFilm. What I'm going to do is find the 'Silo' video in the Media panel,

  • then choose Make Composite Shot from its menu. This opens up a window with the specification

  • of the new composite shot - you don't need to worry about any of this, because it's

  • all based on the Silo video. Hit OK and you'll be greeted with a brand new timeline containing

  • that video layer. Let's add our portal. It's time to explore

  • the most exciting panel in HitFilm: the Effects panel. Here's you'll find a library of

  • over 100 effects, all of which are highly customisable. Remember: 100 effects in your

  • library doesn't mean you can only do 100 things in HitFilm. You can combine all of

  • those effects in unique ways to design completely new visuals that we've never thought of.

  • Think of it like a toolbox - you might only have 30 tools, but you can use them to build

  • a house. You can browse through the folders, but an

  • easier way to find something if you know what it's called is to type into the search box.

  • In this case, type 'Rift'. The Dimension Rift effect is what we'll use for the portal.

  • Effects can be dragged from the Effects panel onto your timeline layers. So the obvious

  • thing to do is drag the effect onto the Silo video, right? Well, you can do that, but then

  • you don't have an easy way to position the effect in 3D.

  • Instead, I'll remove the effect from there and go to the New Layer menu down on the timeline.

  • This is where you can create special layers right inside HitFilm. Select the 'Plane'

  • option. Planes are simple coloured rectangles, but they're massively useful. Rename it

  • to 'Portal host' and hit 'OK'. Your screen's gone black, but don't panic

  • - that's because we just created a large black rectangle, which is now the top layer

  • on our timeline. Higher layers obscure lower layers. If you click and drag on it in the

  • Viewer you can move it around. Click the Undo button to put it back to its original position.

  • Drag that Dimension Rift effect from the Effects panel again, and this time drop it onto the

  • Portal host layer. In HitFilm, every layer can be fine tuned and customised. Clicking

  • the little triangle opens up the layer to show more controls. If you head over to the

  • Controls panel you'll find the controls there too.

  • OK, with the Portal host layer selected, go to Controls panel and open up the Effects

  • group by clicking the triangle. Inside you can see the Dimension Rift effect, and clicking

  • the triangle next to it shows the effect's controls.

  • Right at the top you'll see that 'Wall image' is set to 'none'. This means

  • that we're just seeing that black plane rectangle behind the portal effect. What we

  • want to do is see the side of the silo, so click the menu and select the Silo layer.

  • Now comes the clever bit. So far you've got a couple of 2D layers on the timeline.

  • It's time to explore HitFilm's 3D compositing capabilities. On the timeline you'll see

  • a chequered square on each layer. Clicking this reveals the dimensional options. Switch

  • the Portal host layer from 2D to 3D plane. You'll be asked if you want to add a 3D

  • camera. Without hesitation, Hit YES. OK, at first glance not much has changed,

  • other than funky green and red lines up in the Viewer. Open up the Transform controls

  • for the Portal host and you'll see that the position and rotation properties now have

  • three settings. These represent the X, Y and Z axes - width, height, and DEPTH.

  • Click and drag on the rotation (Y) wheel. As you do, watch the layer rotate in the Viewer.

  • You can now see that the dimension rift effect is actually rendering a 3D surface on the

  • portal. Pretty neat. OK, to get the effect on the correct angle

  • for the silo wall, the easiest thing to do is type in values directly. So click on the

  • Y value and type 14, then hit enter. Then for the Z rotation change it to 2.

  • The effect is too large currently. Adjust the Scale value to shrink it down. 62% works

  • pretty well. To move the effect into place, the most intuitive way is to use the controls

  • in the Viewer itself. So with the layer selected, you'll see three arrows. Clicking and dragging

  • on the Red one will move the portal horizontally. This looks super awesome, right until I play

  • the shot or move the playhead. Suddenly it becomes clear that the effect is staying in

  • the same place while the camera moves around behind it.

  • We need to get us some tracking. HitFilm comes with built-in feature tracking, which is perfect

  • for a shot like this. We need to track the Silo video, so back on

  • the timeline open up the Silo layer and look for the Tracks section. You should be able

  • to see a Plus icon. IF you can't see it, try dragging the divider between the layer

  • listing and the timeline to make more room. Clicking that Plus adds a new Track to the

  • layer. You'll also see that the Viewer has switched to the Layer view. The Layer view

  • is designed to show you ONLY the selected layer, without any other distractions. This

  • is really handy for tracking, when you just want to see the layer in its original form.

  • Right in the middle of the frame you'll see two boxes. This is your first tracking

  • marker! You use this to tell HitFIlm what you want to track. The orange box defines

  • the feature you're tracking, while the green box is the area in which HitFilm will search

  • for it on each frame. So on fast moving shots you're going to need a larger green search

  • box than on slower shots, right? This shot is great for tracking because there's

  • a lot of nicely defined detail. Click and drag one of the corners of the orange box

  • to enlarge it. Then drag inside the orange box to reposition it. There are lots of good

  • places to track, but I'm going to go for this corner here. Now, there's a lot of

  • wobbly movement in this shot. Using a single tracking point like this is great if the movement

  • is only horizontal or vertical, but we've also got some rotation. For HitFilm to work

  • that one you need to give it some additional data.

  • Soooo….in the Type menu, switch to Double Points. This adds a second tracking point.

  • The important thing to note is that this is still for the same track. HitFilm will compare

  • the data from both tracking points to figure out the rotation of the shot. I'll stick

  • this one a little way away, so that there's a separation of movement between the two.

  • OK, let's track forwards by clicking the play button up on the Track panel. This will

  • quickly go through the frames tracking those features.

  • It's now time to head back to that New Layer menu. This time select the 'Point' option.

  • This adds a point layer to the timeline. Point layers don't really do anything at first

  • - they're simply reference markers. But back in the Tracker - you might need to find

  • the Silo layer on the timeline and select the Tracker again - we can now go to the Layer

  • menu and selec that new point. Make sure Rotation is also selected, then

  • hit 'Apply'. This will take the tracked data and add it to the point layer. Up top,

  • click the Viewer tab to switch back to the main view. Then scroll up the timeline, find

  • the new point layer and select it. If you move through the timeline you'll see that

  • the point layer is perfectly attached to the movement.

  • The benefit of applying tracking data to a point layer is that you can then use that

  • point layer to control multiple other layers. Although we're not going to get that detailed

  • in this tutorial, it's a good habit to get into as it gives you lots of flexibility to

  • combine layers and effects together. What we do need to do is link our portal layer

  • to our tracked point layer. On the timeline every layer has a parent menu, which is initially

  • set to 'none'. Find the Portal host layer, open its parent layer and select the New point

  • layer. So the way it works is that a parent layer controls a child layer. It's that

  • whole parent-child thing. Everyone knows how that works, right?

  • Aaaand, our portal is now magically attached to the wall, and you know how to track - something

  • you'll use over and over again in all kinds of VFX shots.

  • Right now we have a disconnected portal. Select the portal layer and head back to the Controls

  • panel. Check out the Expansion slider - moving this opens and closes the portal, complete

  • with some cool distortion of the background. Increasing the Connection dissolves the portal

  • surface, revealing the View. Currently this is just a hole, looking through

  • to the Silo layer. What we need is to see the shot of the Thug. Dimension rift makes

  • this really easy to do. In the Media panel, locate the Thug video and drag it down onto

  • the timeline. Once it's there, we'll actually disable its visiblity by clicking the eye

  • icon next to the layer. This makes it invisible, without removing it from the timeline.

  • Although we can't see the layer directly, we CAN still reference it elsewhere. So back

  • in the dimension rift controls, in the View section, I'll set the Image to the 'Thug'

  • layer. And there he is, perfectly composited inside the portal.

  • The depth and exact position of the thug relative to the portal surface can be further adjusted

  • if you want. As with pretty much everything in HItFilm,

  • there's a bunch of extra controls for customising the dimension rift. I do encourage you to

  • go play around. Remember that you can undo everything, as HitFilm tracks your actions

  • via the History panel. Don't be afraid to experiment - that's when most of the best

  • VFX shots happen. We've covered the fundamentals for creating

  • portal shots in HitFilm. The project files you downloaded also include the more advanced

  • version of the portal used in PORTAL COMBAT. Now that you have an idea of how layers and

  • effects work in HitFilm, take a peek into those composite shots to see how they hang

  • together. One particularly interesting aspect of the

  • Portal Shot Advanced composite shot is that it actually has another composite shot embedded

  • inside it. Check out the Orange Portal layer. If you double click on the layer name, it'll

  • open up the composite shot containing the portal design. As you can see, it's combining

  • the dimension rift effect with some custom flame elements to create a more complex result.

  • As you can see, the portal alone is made up of 10 layers. By grouping them all into a

  • specific composite shot, it helps to keep the main composite shot nice and tidy.

  • Visual effects is a huge subject. We have lot of tutorials on our YouTube channel and

  • you'll find lots of friendly people on the HitFilm.com forums more than happy to answer

  • questions and share techniques. If you're just starting out on your VFX journey, you've

  • got exciting times ahead. Until next time, I'm Simon Jones, and many

  • thanks for watching.

Greetings, filmmakers! I'm Simon Jones from HitFilm.com, here with an extended look at

Subtitles and vocabulary

Click the word to look it up Click the word to find further inforamtion about it