Subtitles section Play video
Hey everybody it's Ruan here from Tunnelvizion TV and today I am going to show you guys a
quick tutorial on how to use Davinci Resolve 10 for basic color grading. So first of all
let me log into my Davinci account and I'm just going to click on the little plus to
create a new project and let's just call this tutorial and then click on create. And double
click on your new project and browse to your footage that you are going to use. And I am
just going to take this clip and drag it into the master window at the bottom and I am going
to click on change just to make it the same settings as the clip. Next step you click
on edit here at the bottom and we are going to create a new timeline - just right click
here at the top create new timeline, give it a name and click on create new timeline.
You drag your clip into your timeline and then you click on the color tab here at the
bottom to start your color grading. So we are just going to do a basic color grade of
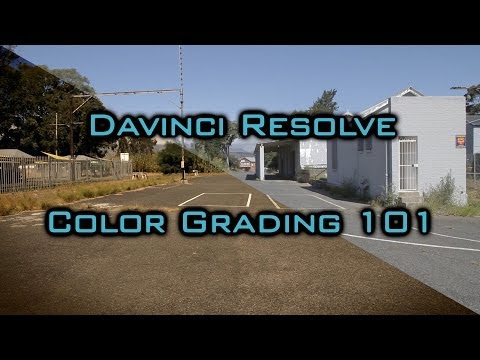
this little clip here. As you can see it's very flat I shot this on a Canon 5D mark ii
using a cinestyle picture profile. As you can see I have my scopes here in the middle
if you want to enable this you click on view and then somewhere down here you will see
video scopes and then make sure that's on and you can position it somewhere on the screen.
So first of all we are going to start with a default node and we're just going to change
some settings that I usually start with. We are going to primaries here at the bottom
and we are going to take the lift and going to drag this wheel until the bottom line of
this section on the scopes go just passed the bottom zero. So just drag that down and
something like that. And we are going to do the same with the highlights So we're going
to go to gain and just push that up a little bit so it goes passed the top like that. Next
we're going to go to this little button here which is primary. So what I want to do is
boost some of the - want to make it look a little bit warm, we are going to push the
reds up a little bit and also take some blue out. Just try and get a little bit of a warmer
look - If we look at the difference you can press shift D to just toggle between disabling
your color grade to see the difference. Next step we are going to create a new node- right
click here click on add node and click corrector and we are just going to drag that onto the
line to insert that new node. And on the second node we going to go to our color wheels again
and we're going to bring down the saturation to around 40 I just like to desaturate my
footage a little bit to get a bit of a film look going so you do that and then what you
can do as well on the second node is you bring up your contrast. So push that up a bit until
you are happy with the contrast in your footage. So if you look at the difference - it's quite
a difference. The next thing I want to do is I want to bring out some of the blue colors
in the sky so I'm going to click on add node again click on corrector drag that onto the
line and we are going to make sure we are on the qualifier button here at the bottom
and then we're going to make sure this button is selected and we're just going to drag over
the sky color. And what you can do is you can click on this little button to view your
selection and you can see we've selected some of the sky - drag over it just make sure you're
selecting some of that color. I can switch this off and then what I'm going to do is
I'm going to boost some of the blues so go to primary and just push up some of the blur
color and you will see if will only affect that section but disable this one node, if
you click below the node it's going to disable just that one node. Which you can see makes
quite a difference in the sky. Next up I want to add a vignette so right click add node
click on corrector drag that onto the line and for this one we're going to select this
little button here I think it's called window and I'm going to enable the circle shape and
then just make it bigger - let's just drag it sideways and also vertical something like
that and then you can change the softness here so it's not like a really harsh circle
and then what you can do you click on the invert button here because we only want the
effect the area outside of the mask and then what I'm going to do is stay on the primary
section here and lower this which will make the footage darker on the side there you can
see. So it's a bit harsh let's just increase the size of the circle or ellipse - just drag
it out here and there's your basic vignette so if you switch that on or off you can see
the difference. If you want to go fullscreen you press control F you can see there is your
color graded clip and if we toggle with shift D you can see that is the original footage
from the camera and that's your color graded clip which looks quite nice I think. This
is a very basic grade so there you go I think Davinci resolve is one of the best color grading
tools out there at the moment and with the lite version which is free it's really really
great so check it out I am actually looking forward to the new version Davinci Resolve
11 which is coming out in June so I hope you guys enjoyed this tutorial and see you guys
next time - cheers!