
achieve
US /əˈtʃiv/
UK /ə'tʃi:v/
- Transitive Verb
- To succeed in doing good, usually by working hard
- To succeed in reaching a particular goal, status, or standard, often after effort or perseverance.
A2TOEICMoreanimate
US /ˈænəˌmet/
UK /'ænɪmeɪt/
- Transitive Verb
- To give life, energy, or motion to something
B2Moreanimation
US /ˌænəˈmeʃən/
UK /ˌænɪˈmeɪʃn/
- Uncountable Noun
- The process of creating moving images using drawings, computer graphics, or other techniques.
- Liveliness or energy in behavior or expression.
B2Moreassemble
US /əˈsɛmbəl/
UK /əˈsembl/
- Transitive Verb
- To put parts together to make a complete unit
- Verb (Transitive/Intransitive)
- To gather together in one place
B1TOEICMorebunch
US /bʌntʃ/
UK /bʌntʃ/
- Noun (Countable/Uncountable)
- A group of things of the same kind
- A group of people.
- Transitive Verb
- To group people or things closely together
B1Morechallenge
US /ˈtʃæləndʒ/
UK /'tʃælɪndʒ/
- Noun (Countable/Uncountable)
- An activity you wish to try that may be hard to do
- Act of formally inviting someone to compete
- Transitive Verb
- To formally invite someone to compete at something
- To question the correctness of something
A2Moredepict
US /dɪˈpɪkt/
UK /dɪ'pɪkt/
- Transitive Verb
- To represent or describe something using words
- To represent or show something in a picture or painting; to portray visually.
B1TOEICMoredetermine
US /dɪˈtɚmɪn/
UK /dɪ'tɜ:mɪn/
- Transitive Verb
- To control exactly how something will be or act
- To establish the facts about; discover
A2TOEICMoreedge
US /ɛdʒ/
UK /edʒ/
- Noun (Countable/Uncountable)
- An advantage you have over others
- Cutting side of a sharp object
- Transitive Verb
- To cut something to make the blade sharp
- To go around the boundary of something
A2TOEICMoreengineering
US /ˌendʒɪˈnɪrɪŋ/
UK /ˌendʒɪˈnɪərɪŋ/
- Uncountable Noun
- The practical application of science to industry
B1Moreexplore
US /ɪkˈsplɔr/
UK /ɪk'splɔ:(r)/
- Transitive Verb
- To examine something in detail to learn about it
- To travel to a place to discover more about it
A2TOEICMorefancy
US /ˈfænsi/
UK /'fænsɪ/
- Verb (Transitive/Intransitive)
- To want to have or do something; feel like
- To imagine or suppose that something will happen
- Adjective
- Unusual and attractive in design
A2TOEICMoreflip
US /flɪp/
UK /flɪp/
- Verb (Transitive/Intransitive)
- To turn your body in the air, as in gymnastics
- To move into a different position quickly
- Noun
- Act of turning your body in the air; somersault
- Movement of something from one position to another
B2Morefold
US /fold/
UK /fəʊld/
- Transitive Verb
- To bend one part of something against another
- (Of business) to fail or close down
- Countable Noun
- Pen where sheep are kept
- Group of people who have a common belief
B1TOEICMorefolder
US /ˈfoʊldə(r)/
UK /ˈfəʊldə(r)/
- Countable Noun
- Container that holds documents
B2TOEICMoreframe
US /frem/
UK /freɪm/
- Transitive Verb
- To make a person that is not guilty appear guilty
- To put say or write something in a careful way
- Noun (Countable/Uncountable)
- Structure that holds a picture or photo
- A person's body shape determined by their skeleton
A2TOEICMoregigantic
US /dʒaɪˈɡæntɪk/
UK /dʒaɪ'ɡæntɪk/
- Adjective
- Extremely large
- Of very great size, extent, or degree.
B2Moreglue
US /ɡlu/
UK /ɡlu:/
- Noun (Countable/Uncountable)
- Sticky substance used for joining things together
- Transitive Verb
- To join or affix things with glue or paste
B1Morehandy
US /ˈhændi/
UK /'hændɪ/
- Adjective
- Convenient, easy to use, easy to reach
- Being skillful in performing small tasks
C2Morehave to
US /hæv tu/
UK /ˈhæv tə/
- Auxiliary Verb
- Must do
A1Moreillusion
US /ɪˈluʒən/
UK /ɪ'lu:ʒn/
- Noun (Countable/Uncountable)
- Idea, image or impression that is not correct
- Something that deceives by producing a false or misleading impression of reality.
B2Morein color
US
UK
- Phrase
- Displayed or produced using all colors; not black and white.
- Adjective
- Full of vivid colors; bright and vibrant.
A1Moreindividual
US /ˌɪndəˈvɪdʒuəl/
UK /ˌɪndɪˈvɪdʒuəl/
- Countable Noun
- Single person, looked at separately from others
- A single thing or item, especially when part of a set or group.
- Adjective
- Made for use by one single person
- Having a distinct manner different from others
A2Moreinstead of
US /ɪnˈstɛd ʌv/
UK /inˈsted ɔv/
- Preposition
- When one thing is replaced by another
- Adverb
- As a substitute or alternative.
A1Morelayer
US /ˈleɚ/
UK /ˈleiə/
- Noun (Countable/Uncountable)
- One of several sheets of a material or object
- A covering of something spread over a surface.
- Transitive Verb
- To put things one on top of another
B1TOEICMoremock
US /mɑk/
UK /mɒk/
- Transitive Verb
- To laugh at someone or something in an unkind way
- Adjective
- Not genuine or real, but attempting to appear so
B1Moremultiple
US /ˈmʌltəpəl/
UK /ˈmʌltɪpl/
- Adjective
- Having or involving more than one of something
- Having or involving several parts, elements, or members.
- Countable Noun
- Number produced by multiplying a smaller number
- A number of identical circuit elements connected in parallel or series.
B1Moreoccasion
US /əˈkeʒən/
UK /ə'keɪʒn/
- Noun
- Significant or important event or function
- Time when something happens or takes place
- Transitive Verb
- To make or cause something to happen; to lead to
A2TOEICMoreof course
US /ʌv kɔː(r)s/
UK /ɔv kɔː(r)s/
- Adverb
- Sure ; Certainly
- Phrase
- For sure; certainly
A2Moreon paper
US /ɑn ˈpeɪpər/
UK /ɔn ˈpeipə/
- Phrase
- In theory or as a plan, but not necessarily in reality.
- Recorded in writing; documented.
A1Moreplot
US /plɑt/
UK /plɒt/
- Countable Noun
- Small piece of land for a house growing crops etc.
- Series of events that form the main story
- Transitive Verb
- To mark a path, etc. on a map, using lines or dots
- To devise or develop a dramatic storyline
B1Morepop
US /pɑp/
UK /pɒp/
- Verb (Transitive/Intransitive)
- To cause something to open or burst suddenly
- To go to or in a place for a brief period of time
- Noun (Countable/Uncountable)
- Sweet soda drink
- A short, sharp, explosive sound.
B2Morepop up
US /pɑp ʌp/
UK /pɔp ʌp/
- Intransitive Verb
- To appear suddenly.
- Phrasal Verb
- To appear suddenly and unexpectedly.
- To appear on a computer screen.
A1Morepreliminary
US /prɪˈlɪməˌnɛri/
UK /prɪˈlɪmɪnəri/
- Adjective
- Happening or necessary before a thing happens
- Serving as a preparation; introductory
- Noun (Countable/Uncountable)
- Action preparing for the main event
- A preliminary action, step, or measure
B1Moreproperly
US /ˈprɑːpərli/
UK /ˈprɔpəlɪ/
- Adverb
- In an appropriate or correct manner
- In a way that is suitable or appropriate.
A2Moreprototype
US /ˈproʊ.t̬ə.taɪp/
UK /ˈprəʊ.tə.taɪp/
- Countable Noun
- A first or preliminary version of a device or vehicle from which other forms are developed
B2Moreshift
US /ʃɪft/
UK /ʃɪft/
- Verb (Transitive/Intransitive)
- To change in position or direction
- To move something from one place to another
- Noun (Countable/Uncountable)
- A change in a persons plans, opinions or beliefs
- Period of work starting at a certain time
A2Moresketch
US /skɛtʃ/
UK /sketʃ/
- Noun
- Brief account of something without many details
- A drawing made quickly that lacks detail
- Transitive Verb
- To make a rough plan or idea of something
- To draw images roughly with a pencil
B1Moreslight
US /slaɪt/
UK /slaɪt/
- Adjective
- Small (amount, quality)
- Appearing thin, delicate and physically weak
- Transitive Verb
- To ignore or treat rudely and with no respect
B1Morespread
US /sprɛd/
UK /spred/
- Noun (Countable/Uncountable)
- A big meal, often laid out as a buffet
- The distance between two things
- Verb (Transitive/Intransitive)
- To place over a large area; to cover a large area
- (Of ideas, gossip) to pass to and affect others
A2TOEICMorestep out
US
UK
- Phrasal Verb
- To go outside for a short time
- To begin a romantic relationship with someone.
A1Moresuch as
US /sʌtʃ æz/
UK /sʌtʃ æz/
- Preposition
- For example; like
A1Moretangible
US /ˈtændʒəbəl/
UK /ˈtændʒəbl/
- Adjective
- Able to be touched or felt; real
- Able to be seen or noticed; obvious; apparent
- Noun (Countable/Uncountable)
- Item which can be seen and touched
- A thing that is perceptible by touch.
B2Morethink of
US /θɪŋk ʌv/
UK /θiŋk ɔv/
- Phrasal Verb
- To look on as (being something specific); consider
- To consider or remember something.
- Verb (Transitive/Intransitive)
- To imagine or call something to mind
A1Moretrial
US /ˈtraɪəl, traɪl/
UK /ˈtraɪəl/
- Noun (Countable/Uncountable)
- Hearing and judgment of a case in court
- Act or process of testing or experimenting
- Transitive Verb
- To be made or done as a test or experiment
A2TOEICMoretrim
US /trɪm/
UK /trɪm/
- Transitive Verb
- To cut (hair, etc.) to make it neater/shorter
B2Moretypical
US /ˈtɪpɪkəl/
UK /ˈtɪpɪkl/
- Adjective
- Normal; usual; expected
- Serving as a representative example of a particular type.
A2Moreunique
US /juˈnik/
UK /jʊ'ni:k/
- Adjective
- Unlike other things; being the only one like it
- Remarkably special or unusual.
A2TOEICMoreunusual
US /ʌnˈjuʒuəl/
UK /ʌnˈju:ʒuəl/
- Adjective
- Being rare or uncommon; not ordinary; strange
- Remarkable or interesting because different from or better than others.
B1Morevisualize
US /ˈvɪʒuəˌlaɪz/
UK /ˈvɪʒuəlaɪz/
- Transitive Verb
- To create a picture in your mind of something
B1More
Vocabulary
- pop up: To appear suddenly.
- think of: To look on as (being something specific); consider
- of course: Sure ; Certainly
- such as: For example; like
- on paper: In theory or as a plan, but not necessarily in reality.
- instead of: When one thing is replaced by another
- step out: To go outside for a short time
- in color: Displayed or produced using all colors; not black and white.
- have to: Must do
- individual: Single person, looked at separately from others
- bunch: A group of things of the same kind
- illusion: Idea, image or impression that is not correct
- multiple: Having or involving more than one of something
- properly: In an appropriate or correct manner
- determine: To control exactly how something will be or act
- flip: To turn your body in the air, as in gymnastics
- achieve: To succeed in doing good, usually by working hard
- fancy: To want to have or do something; feel like
- unique: Unlike other things; being the only one like it
- imagine: To think creatively about; form mental picture of
- spread: A big meal, often laid out as a buffet
- explore: To examine something in detail to learn about it
- trial: Hearing and judgment of a case in court
- shift: To change in position or direction
- occasion: Significant or important event or function
- tangible: Able to be touched or felt; real
- draw: To attract attention to someone or something
- frame: To make a person that is not guilty appear guilty
- plot: Small piece of land for a house growing crops etc.
- edge: An advantage you have over others
- explain: To make clear or easy to understand by describing
- typical: Normal; usual; expected
- gigantic: Extremely large
- effect: An advantage, benefit
- challenge: An activity you wish to try that may be hard to do
- visualize: To create a picture in your mind of something
- depict: To represent or describe something using words
- break: To create a new record e.g. running the 100m dash
- handy: Convenient, easy to use, easy to reach
- layer: One of several sheets of a material or object
- slight: Small (amount, quality)
- animation: The process of creating moving images using drawings, computer graphics, or other techniques.
- fold: To bend one part of something against another
- pop: To cause something to open or burst suddenly
- assemble: To put parts together to make a complete unit
- mock: To laugh at someone or something in an unkind way
- trim: To cut (hair, etc.) to make it neater/shorter
- support: To give assistance or advice to someone
- detail: Small part of something; tiny fact
- animate: To give life, energy, or motion to something
- prototype: A first or preliminary version of a device or vehicle from which other forms are developed
- sketch: Brief account of something without many details
- basic: At the most important or easiest (beginner) level
- step: Movement done as part of a particular dance
- make: To arrange or prepare something e.g. dinner
- product: Item that can be bought
- preliminary: Happening or necessary before a thing happens
- unusual: Being rare or uncommon; not ordinary; strange
- tectonic: Denoting or relating to construction or building
- start: First time or place that a thing exists; beginning
- glue: Sticky substance used for joining things together
- side: To decide to agree with one point, not the other
- lesson: Something done to learn or teach something; class
- folder: Container that holds documents
- engineering: The practical application of science to industry
Get the full experience in the app
Learn anywhere with detailed sentence and usage analysis
01:03
She took a brave step forward, leaving behind her comfort zone to chase her dreams.
Vocabulary
- brave
adj. Having courage
- comfort zone
phr. A familiar situation where one feels safe
Explanation
a brave step is a noun phrase, where brave is an adjective modifying the noun step, meaning "a courageous step".
forward is an adverb modifying step, meaning "ahead".
The whole phrase serves as the object, answering the "what" of took (verb) — she took a brave step forward.
Get the full experience in the app
Look up words anytime with pronunciation, part of speech, and usage
brave
US/brev/
UK/breɪv/
adj.Brave
v.t.To bravely face
A2 Elementary
Get the full experience in the app
Practice speaking anytime and get instant pronunciation feedback
Try this speaking exercise.
Try practicing with this sentence.
80
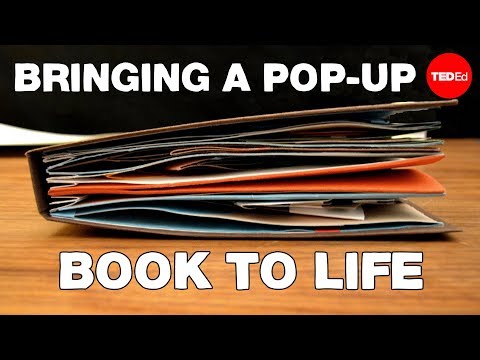
【TED-Ed】Making a TED-Ed Lesson: Bringing a pop-up book to life
0
Ann posted on 2021/06/15Ever wondered how pop-up books are made? This video dives into the amazing world of paper engineering to bring a pop-up book about tectonic plates to life, using cool stop-motion techniques! You'll pick up some fantastic vocabulary related to crafts and science while learning how this incredible visual effect is achieved.
Learn this video on the APP!
The VoiceTube App has more in-depth practice for videos!