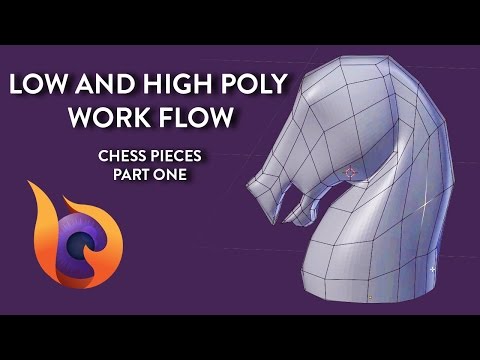
Placeholder Image

Subtitles section Play video

  • Hi there, my name is Tyler with TimefireVR.

  • This video will be the first in a

  • three-part series going over

  • a king and knight chestpiece.

  • Part one will go over the

  • low and high poly of the king

  • and the beginnings of the high poly for the knight.

  • The second part will finish up the knight high poly

  • and part three will cover the knight low poly.

  • To start out I'm making a low poly

  • for the king from an edge that will

  • be used to create the full silhouette with a spin.

  • Because of the workflow I'm using

  • I don't need to worry too much about rounding the edges.

  • I just need the extremes which will be smoothed after

  • applying a subdivision surface modifier later.

  • Adding a "spin" will create a lathe

  • type effect that will create the full

  • shape I'm going for.

  • You should adjust the number of steps or vertical edges

  • based on the size of the object

  • in engine or in relation to other objects.

  • These pieces are going to almost be

  • player size so it needs a few extra steps.

  • You can see I get ahead of myself

  • and duplicate, then delete.

  • Before duplicating the mesh I need to make it

  • watertight because it can be flipped over in engine.

  • Once that's done I can

  • then duplicate and make a version that

  • will get a sub surface modifier.

  • Starting on the high poly version now I

  • switch the mesh to wireframe so i can

  • see through to the reference and then

  • add the subdivision modifier to start

  • with the control loops.

  • A large chunk forward is working with control loops to

  • get harder edges where the sub surface

  • modifier is smoothing or averaging

  • I try to have a chunkier, smoother edge

  • than what the asset may have in real life.

  • This will give the normal map a larger

  • range of pixels to work with resulting

  • in better base with less artifacts and seams.

  • I often do a few passes on spreading

  • out the control loopd until I think

  • they're good for baking which will then

  • get tweaked further after a test bake.

  • You'll also notice not everything gets

  • a control loop.

  • There's a few different ways I manipulate the high poly

  • and meshes in general.

  • The initial creation

  • of the mesh and I'm focusing on the large, main shapes.

  • These are the secondary

  • details the bevels and medium shapes.

  • For sharper control on edges, I'll drag a

  • control loop towards the edge from both sides.

  • This will reduce the amount of

  • subsurface modifier has to average

  • effectively making the end sharper.

  • For larger rounder shapes you can bevel the

  • edge creating two or three edges.

  • Then scale or remove the center edge for

  • varying results until you're happy.

  • To make deep cuts, grab an edge or create

  • one with Ctrl+R wherever you want the cut to be.

  • Then bevel the edges to

  • make a total of at least three edges.

  • The center edge is what will get scaled or

  • moved in the direction you want the cut.

  • Support loops may be needed depending on

  • the result you're after.

  • With that high poly done we skipped

  • forward to the base of the knight.

  • For all the pieces, after the king I duplicated

  • the bases and modified accordingly.

  • The knight has a slightly different base so

  • needs edits before starting the actual horse.

  • I start the horse head with a simple cube

  • For a more accurate

  • placement i select an edge ring at the

  • top of the base and center the pivots

  • at that location.

  • I slice down the middle, delete half

  • and mirror but end up using just a plane.

  • Less verts to keep track of in a side orthographic view.

  • From here I’m starting out

  • with the big general shapes again.

  • I want to work with as few verts

  • as possible to stay loose.

  • From the plane, I select verts or edges and extrude,

  • remembering to create polys and not tris.

  • This helps immensely later on in the finer details.

  • It's also important to

  • note a difference in similar hotkeys

  • for this workflow.

  • When connecting verts across NO face

  • you can select the two and hit "F".

  • If you are connecting two verts across a face,

  • you must use "J" otherwise the face will

  • not split into two phases.

  • I'm filling out the silhouette a little

  • now by pulling edges and verts out along the Y.

  • This will help with shadows and

  • visualization while working.

  • Ultimately I'm not super concerned with

  • being accurate to the final thickness yet

  • but the general idea can help.

  • From here I can continue to pull out verts

  • generally following the curves and lines

  • of the reference.

  • Personally I like working with just the

  • verts initially and then going through

  • to add in the polys.

  • It feels faster to me and I can still see the reference

  • without switching the wire mode.

  • There's a lot of orbiting going on at

  • this point and moving forward which is a

  • direct result of adding in some depth or

  • thickness to the mesh.

  • I want to make sure it's looking right from all angles

  • especially since it can be picked up

  • and looked at in VR.

  • I’ve now added the sub surf modifier so I can see what

  • the geometry I have so far is doing.

  • I end up just turning the visibility off

  • and continue modifying the mesh.

  • Also important to note that I'm not working

  • from the reference as much as other pieces.

  • I have a concept I've doodled

  • that more closely represents what I want

  • which is then supplemented by an

  • additional reference on another screen.

  • At this point there's a lot of small

  • tweaks all over getting closer to a silhouette I want.

  • I want to get these base shaped figured out

  • and solid before I move on to the

  • smaller details and start adding in more loops.

  • These edits are coming from the

  • reference I have scene, the concept I made

  • which is on my desk and reference

  • of horse anatomy on another screen.

  • Another useful tip is working all over

  • the model and being as loose as possible,

  • much like you would in the early stages of a painting.

  • This helps me keep all the verts moving and useful.

  • Now working a lot on the thickness of

  • the mesh trying to be somewhat

  • respectful to the underlying musculature.

  • I don't want this horse to be super

  • realistic more of a smoother stylized

  • representation to go with the set and

  • keep dev time down.

  • Another quick session of orbiting around

  • the mesh to check all the angles of

  • silhouette before moving on to more

  • general tweaks.

  • I'm adding in a Matcap now so I can see

  • shadows and highlights a little easier.

  • This helps with seeing exactly what your

  • shapes are doing especially on a high poly.

  • As said earlier, I want to make sure

  • every vert and edge doing something.

  • I don't like a lot of flat surfaces on

  • an organic model, which is why I go through

  • the neck and start lifting verts.

  • Important to also note I'm shaping the

  • geometry to bend with the curve of neck.

  • This helps out later when adding

  • in control loops for the finer details while

  • maintaining a fairly clean mesh to get a low poly from.

  • And with that we conclude the first

  • video of the Low and High Poly Workflow.

  • Check out part 2 where I'll go over

  • creating the hair and ears.

  • Then I'll finish up the high poly with some edge loops

  • and small tweaks

  • Be sure to let us know what you thought of part one! of

  • Like and follow if you want

  • more videos like this from the TimefireVR team.

Hi there, my name is Tyler with TimefireVR.

Subtitles and vocabulary

Click the word to look it up Click the word to find further inforamtion about it